Connecting torch

|
Hand tighten the torch connectors. Loose connectors may overheat, create contact disturbances, mechanical damage and water or gas leakage. |

|
For connecting the torch, refer also to your welding equipment’s instructions. |
Gas-cooled TIG torch (series 5)
|
1.
|
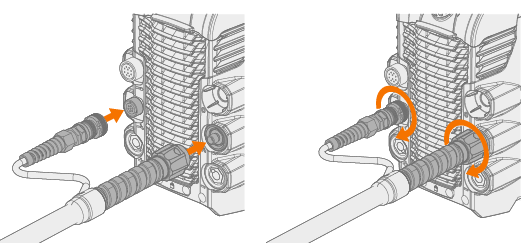
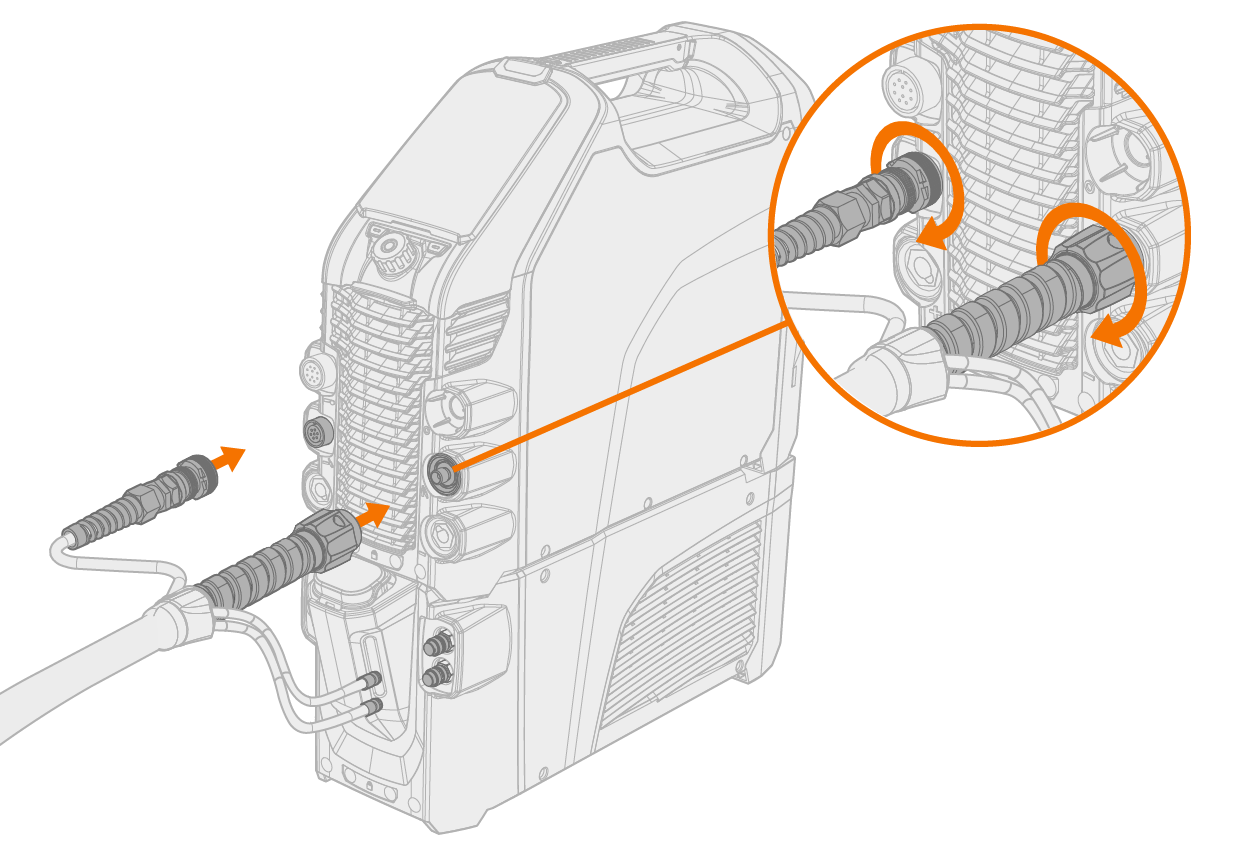
Connect the welding cable and the control cable to the power source. Secure by turning the connectors clockwise. |
Water-cooled TIG torch (series 5)
|
1.
|
Connect the welding cable and the control cable to the power source. Secure by turning the connectors clockwise. |
|
2.
|
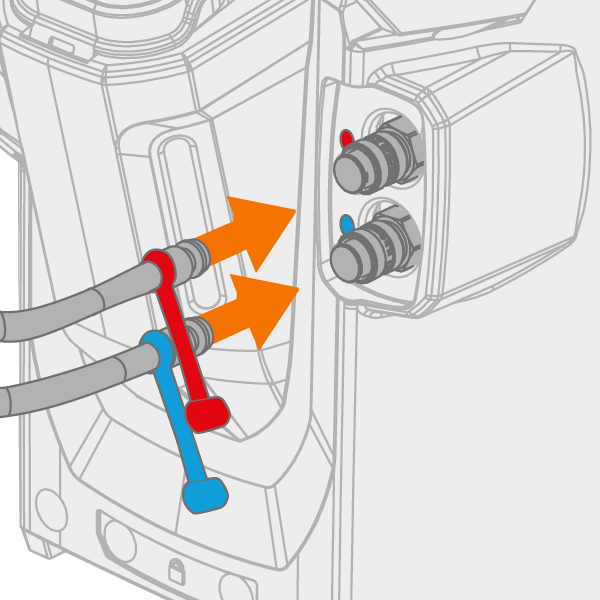
Connect the coolant inlet and outlet hoses to the cooling unit. Note that the connectors are color-coded. |
|
|
Make sure to connect the coolant hoses to the correct hose connectors. If the connections cross, the
torch and torch body may overheat. |
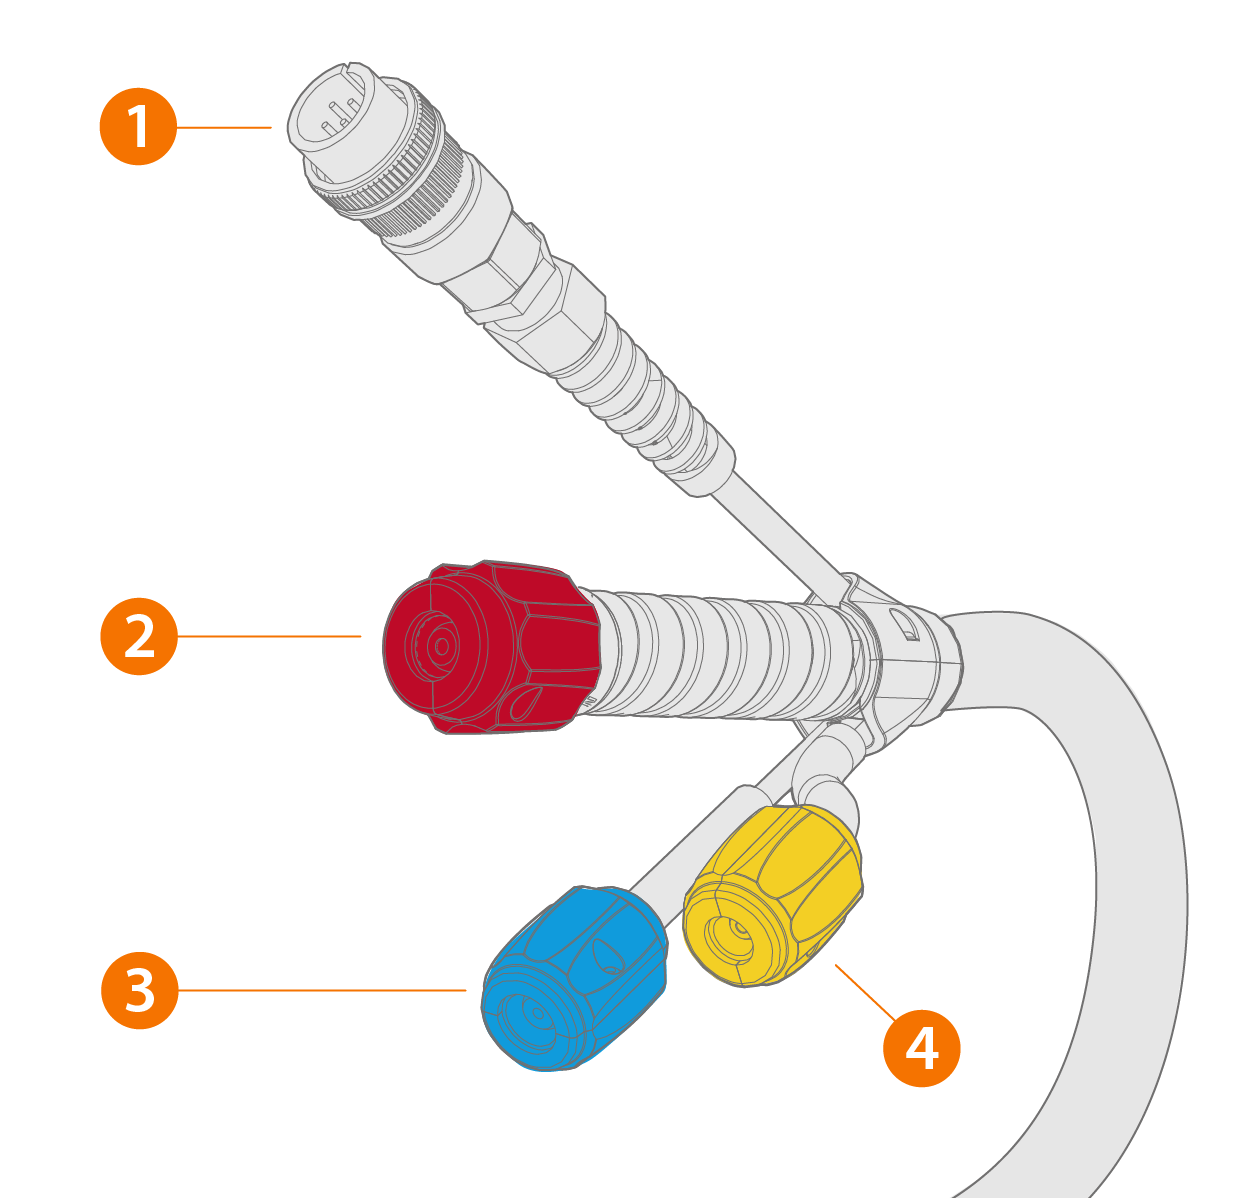
Connectors in TIG torch (series 5)
|
1.
|
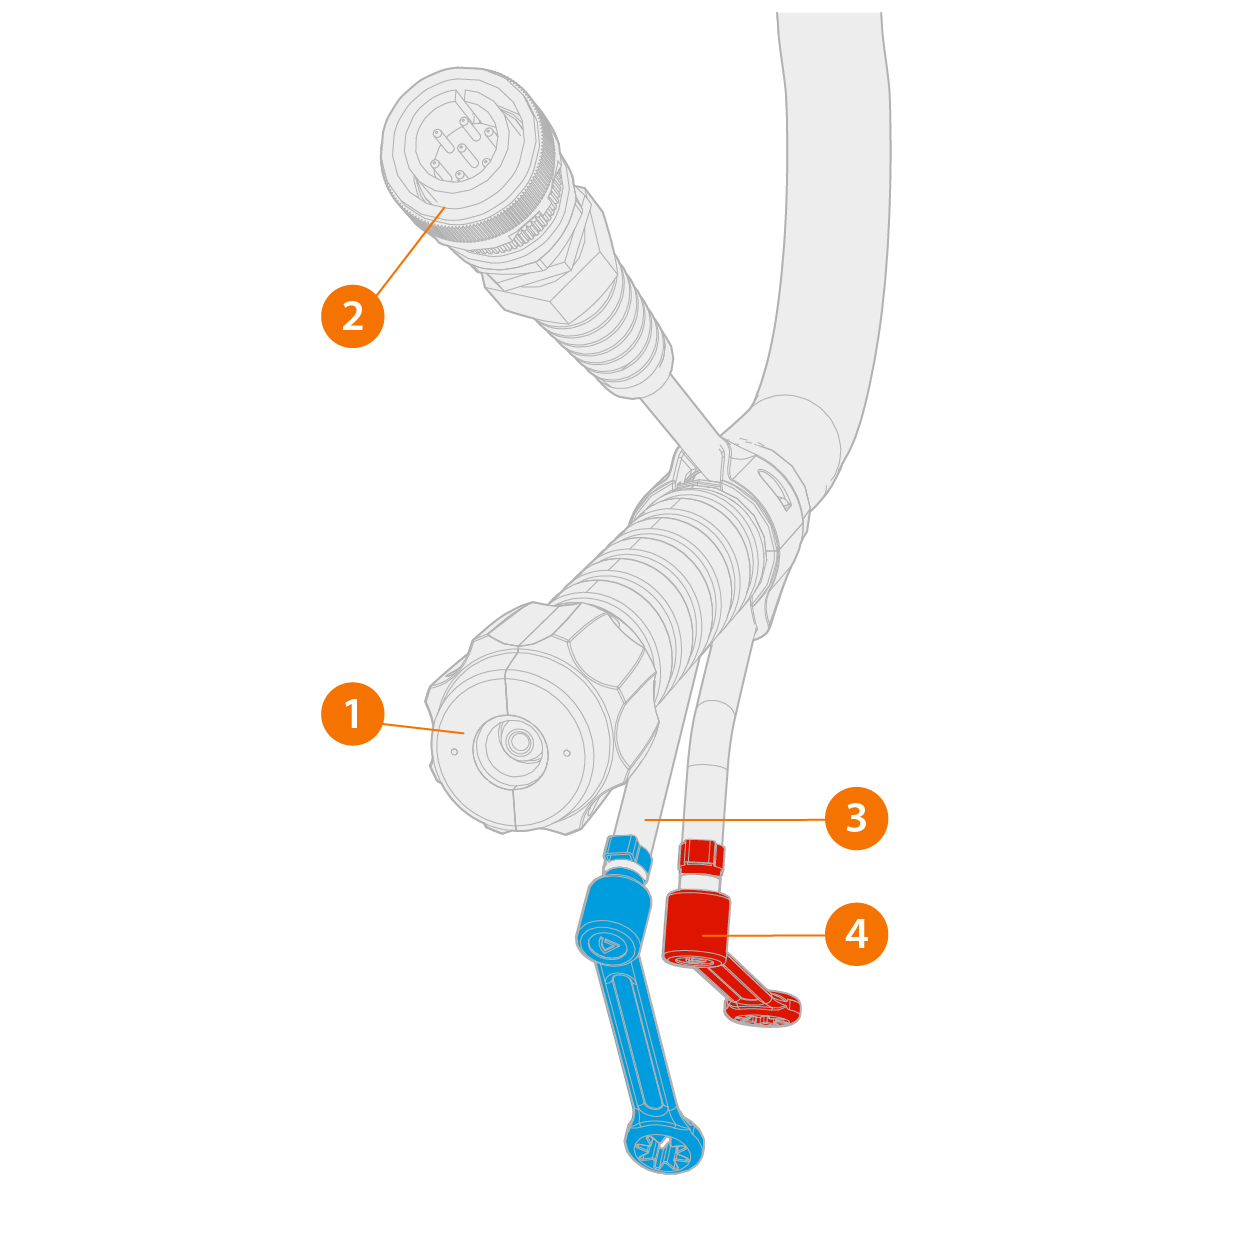
Welding cable connector |
|
2.
|
Control cable connector |
|
3.
|
Coolant hose connector |
|
4.
|
Coolant hose connector |
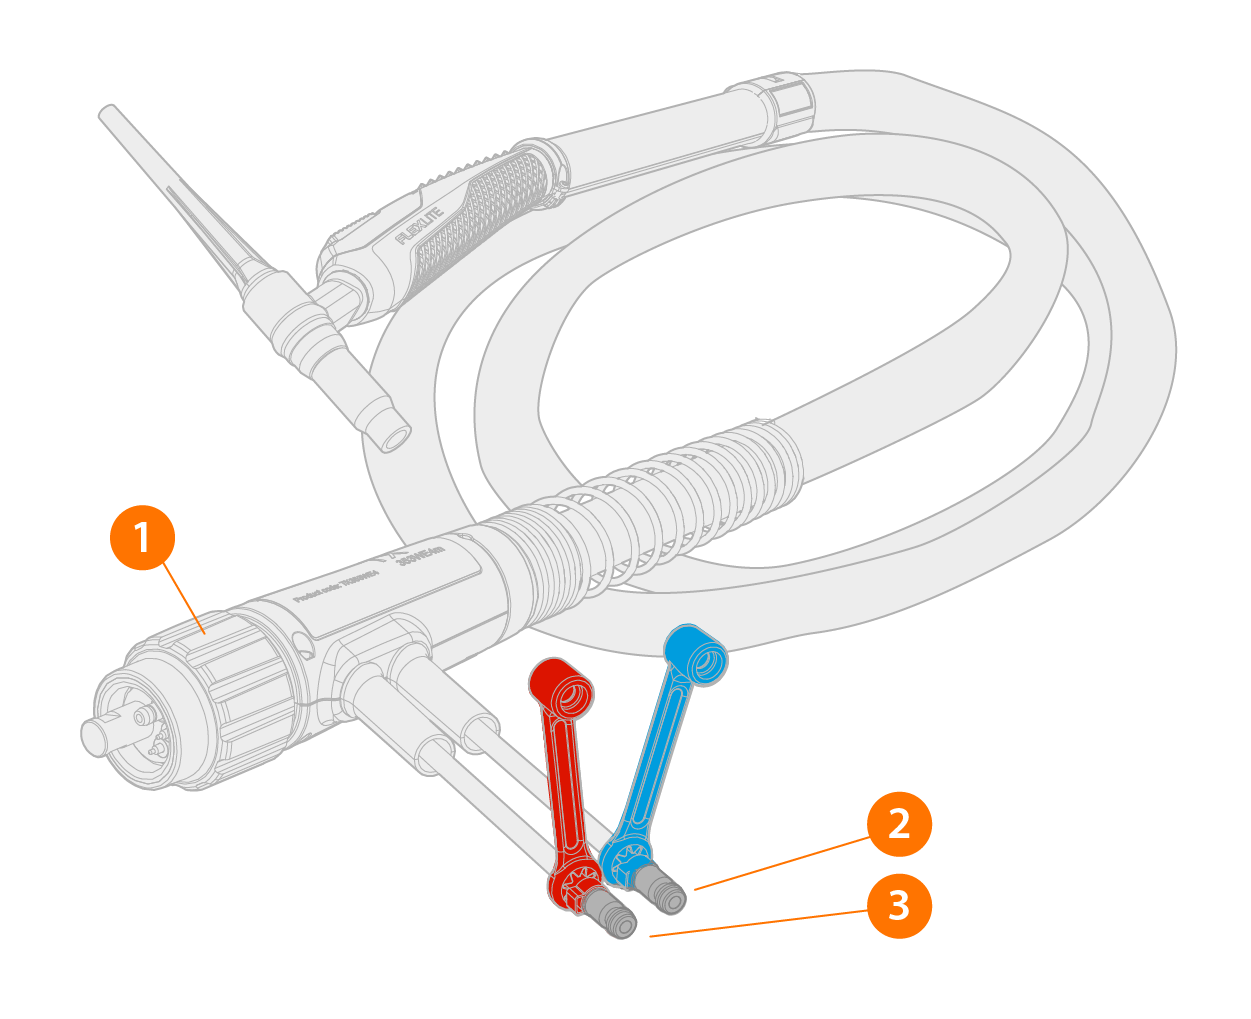
Connectors in TIG torch (series 3)
|
1.
|
Control cable connector. |
|
2.
|
Welding cable and coolant connector. In water-cooled torches this is the coolant outlet hose connector. In gas-cooled torches this is the shielding gas connector. |
|
3.
|
Coolant inlet hose connector (water-cooled torches only). |
|
4.
|
Shielding gas connector (water-cooled torches only). |
|
|
With series 3 torches that have a DIX connector, use a separate gas hose for gas connection. |
Connectors in TIG torch with euro connector (series 3)
|
2.
|
Coolant hose connector |
|
3.
|
Coolant hose connector |